
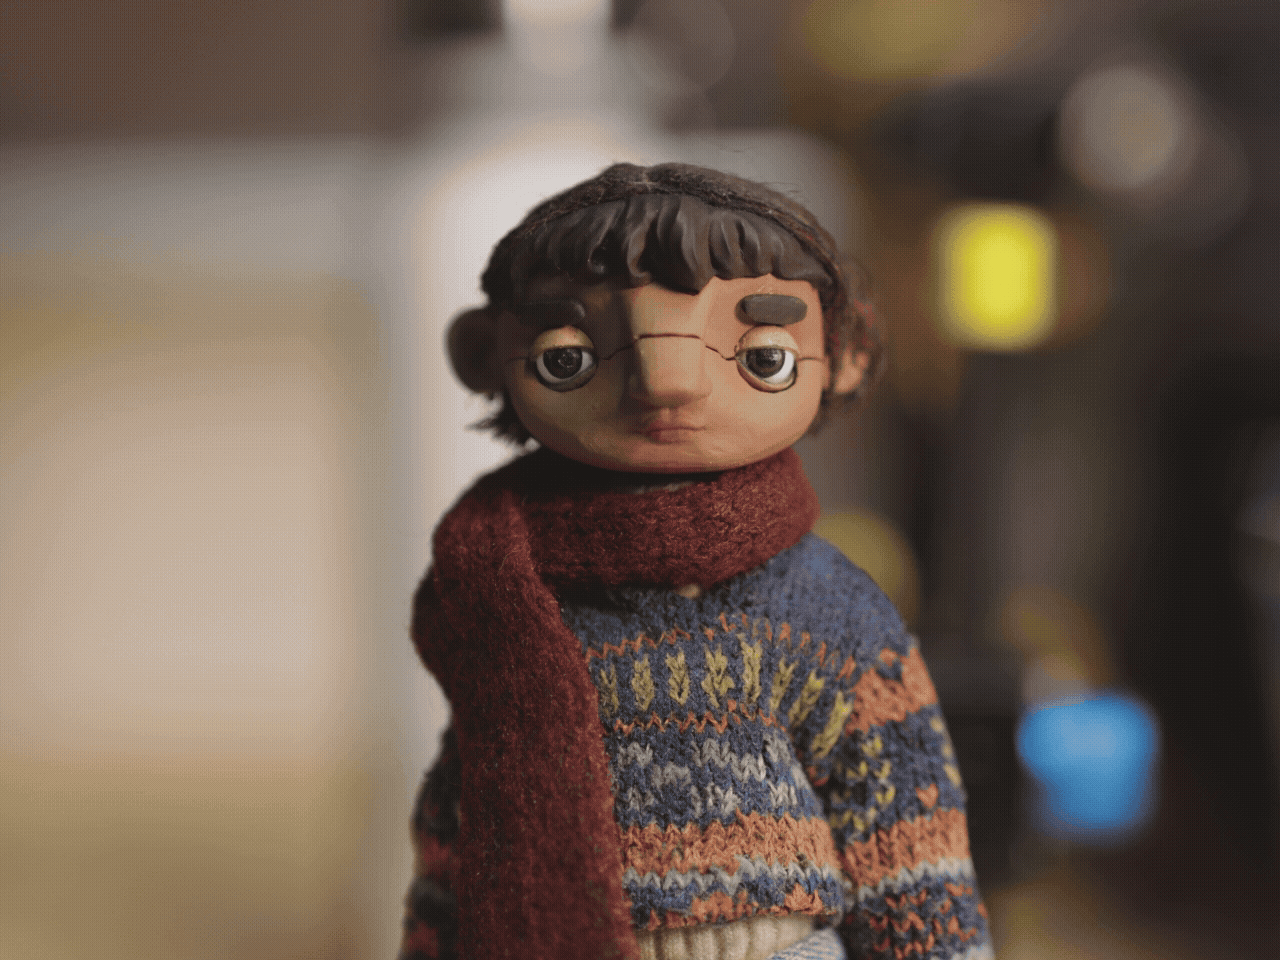
"Sobre el Mar"


Pequeñita (2026).
Ball and socket armature by Malvern Armatures, Upholstery foam, Resin Printed Replacement Faces, Fabric, Chalk Pastels, Silicone, Acrylic Paint, and Wool.
This Puppet was design to resemble 1950's post war Spanish Children fashion, and it features 79 lower mouth replacement pieces that were hand painted, 3D modeled and resin printed. The back of the puppet's head, bangs, eyelids, eyebrows and eyeballs, which are posable, are 3D printed but are not replacements, this decision was made to optimize material costs.
Hands, torso and shoes were silicone casted to allow movement and naturalistic finishes.
The costume was tailored made using machine and hand sewing with a range of found and repurposed fabrics, a miniature knit scarf was made as a pair for "Pequeñita" and "Maravilla" that features wires to make the garment posable.


The armature was sourced from Malvern Armatures, then it was bulked with closed cell foam, upholstery foam and pre-wrap.
Then I started making the costume creating a polymer sculpt of the shoes which I later scanned to create a 3D printed mold which would be casted in silicone. The patterns of the pants were costume made to create a bell bottom shape, a repurposed sock was used for the sweater and undershirt, and a knitted scarf.
Then I sculpted a set of hands and torso to make them posable by using silicone and add structure to the armature, I decided to not do a full body cast with silicone to then use the time to tackle face replacements.
I designed a 3D model likeness of this character to then further developed a functioning and effective mechanism of face replacements.

Replacement Faces.
-
First, using monster clay, I created a bust of my character's face which then would be used as a reference for my 3D modeling process.
-
After having digitalized the bust, I went ahead and started re-topologizing the face so that it would allow me to create an animation.
-
Using the topology as a guide, I started to section the face in three, the back of the head, the jaw, and the forehead. This would allow me to design the mechanism of that would allow the replacement faces to fit together.
-
Then, I created key shapes with expressions and phonemes that I added registration points that are magnetized.
-
After having all of the elements set up, I transfer my models to a resin printer slicer where I engrave the file name and the replacement number.
-
Once all prints are done, I sand them, prime them, add magnets, and add a coat of paint to then finally spray a matte sealer.

1.Clay bust

2.Re-Topology

3.Replacement Mechanism
4.Shape Keys

5.Labeling

6.Finishing touches
3D Printed Molds for Shoes.
I decided to use 3D printed molds to create an identical pair of shoes that could be casted in silicone.
-
Using polymer clay, I sculpted a reference of how the final shoe would look like.
-
Using a 3D scanner, I digitalized the sculpt and 3D modeled it to the design creating a duplicate and altering the shape for the molds.
-
Then I started adding meshes and modifiers to imprint a negative my sculp into the desired shapes making sure to add keys, exit channels and registration points for the armature.


1.Clay bust
2.3D Scanning
3.3D Modeling and Printing
4.Casting

5.Final


Photographed by Maxine Sizemore.
"Get Well Soon"
2025


Main Character (2025).
Silicone, Aluminum wire, Upholstery foam, Epoxy resin, Psyco Paint, and Polymer Clay,
This full body sculpt was designed to have a slim female figure representative of a person going through metastatization. This puppet is a full cast in silicone with the purpose of achieving naturalistic finish and movement.
Upon sculpting the figure, my goal was to model it to showcase the female figure in its unapologetic version through the female lens.
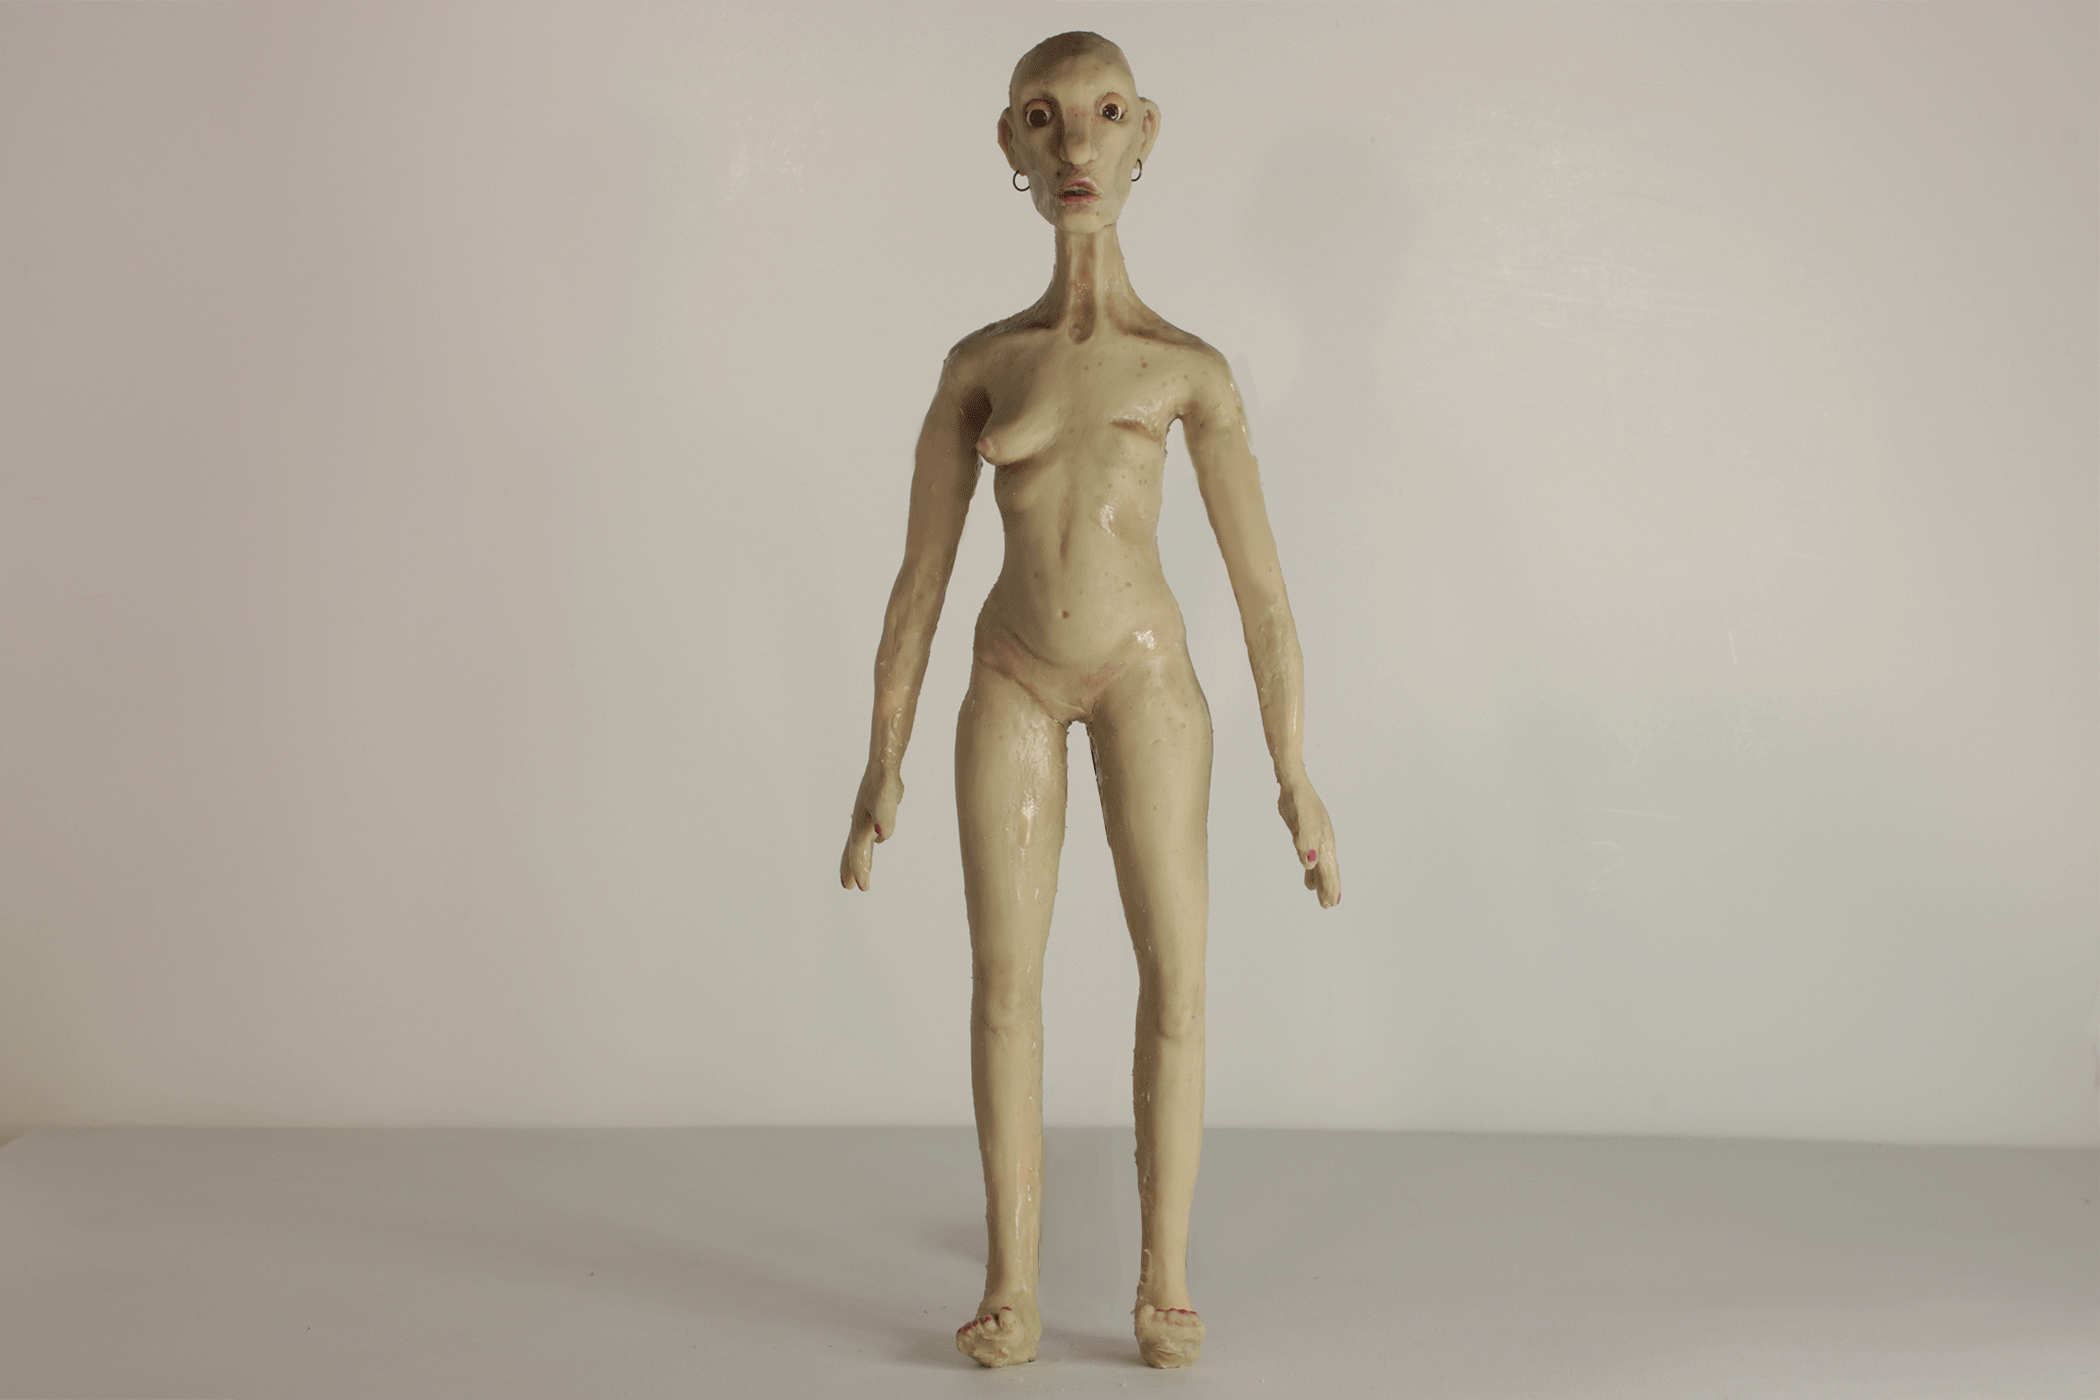
This puppet was made as a set of two, representing two different stages of the breast cancer that the main character of "Get Well Soon" faces. In this round of casting pinker tones were used to give a brighter look to the character's complexion.
This puppet was a collaboration with Isabella Santoro which fabricated the costume.


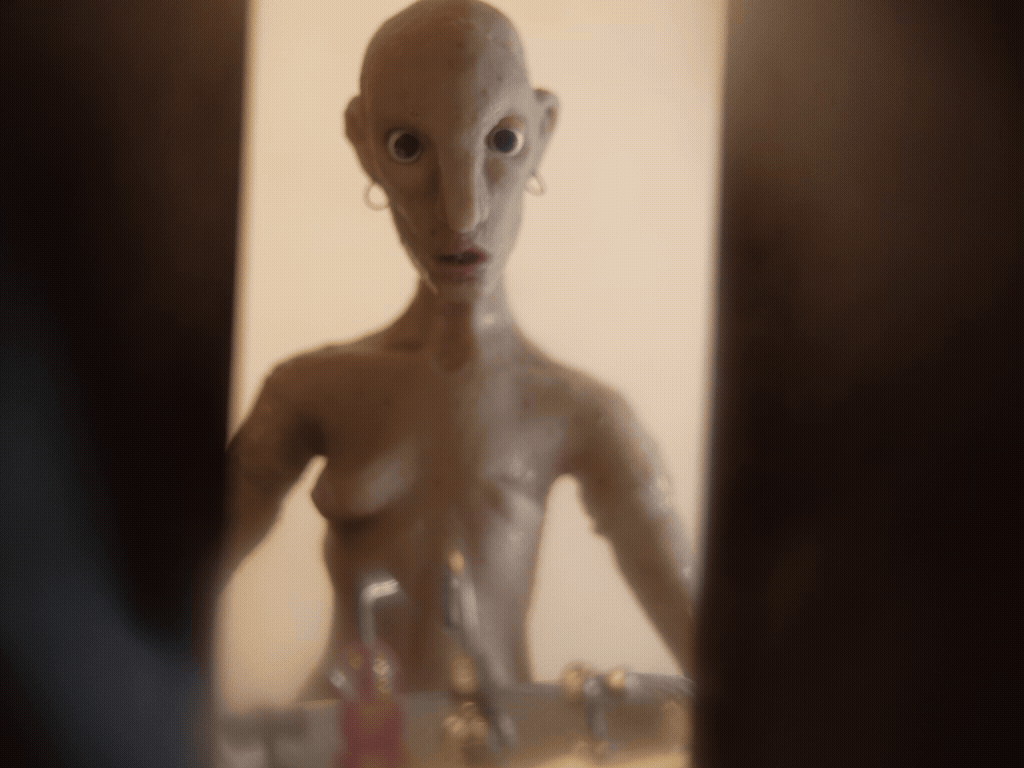
Main Character Head.
Rigged Skull aluminum wire armature casted in silicone.
Rigged Skull aluminum wire armature.
Monster Clay Sculpt for UltraCal casting.

How she moves...
Process.
1.Modeling the puppet with Wax Based Clay (Monster Clay).

2.Casting the sculpts with UltraCal creating a two-part mold.

3.Creating aluminum wire armatures that will achieve the desired character performance.


4.Casting using Silicone and finishing the puppet with Psyco Paint Silicone and Thinner for details as well as Chalk Pastels and 99% Isopropyl Alcohol.
5. Buffing and polishing silicone.
6. Puppet Repairs.


Chest Close-Up 1:1 Scale.
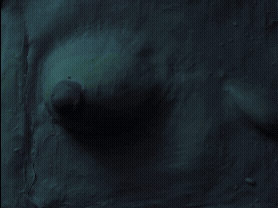
A 1:1 Scale from the chest of the puppet was sculpted for an extreme close-up shot.
This prop was sculpted with Monster Clay, molded with UltraCal and casted with Silicone with the purpose of exploring the transparency of the medium.
Animated by Maxine Sizemore and Miranda Curras.
Nurse (2025).
Aluminum wire, Upholstery foam, Epoxy resin, 3D Printed Resin, Fabric, Magnets, and Liquid Latex.
This puppet was designed to resemble a chemotherapy dripping bag. This puppet features a series of replacement "faces" that showcase the liquid movement of the IV Bag.
With this puppet I got firsthand experience with exploring replacement faces and sewing costumes to a miniature scale.
Animated by Maxine Sizemore.


In Progress.


In Progress shots for "The Nurse", this puppet feature an aluminum wire armature with milliput epoxy putty to create the touch points.
Then I started sculpting the puppets figure with a mixture of closed and open cell foam.
The costume was tailored made and fabric stiffener was added to create the creases of the fabric and to avoid chattering during animation.
The animator wanted freedom with the range of motion; therefore, I designed a replacement animation for the movement of the IV bag, a wire to move the IV fluid chord, and an armature for the IV pole that allows the animator to move the individual arms.
2024
"Sobre el Mar"
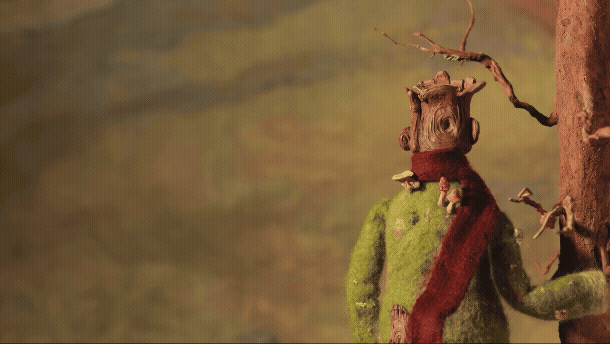
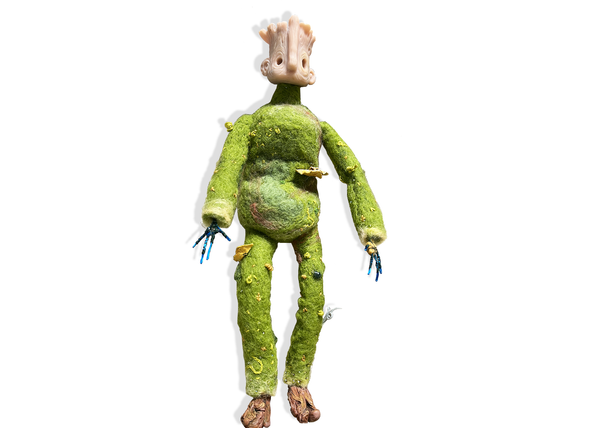
Maravilla (2024).
Aluminum wire, Upholstery foam, Polymer Clay, Latex, Wool felt, Thread, Crystal beads, and Monster Clay.
This puppet was made for the original pitch idea for my film "Sobre el Mar". I was interested in exploring material textures and their interactions with each other; therefore, this puppet was constructed with a mixture of soft materials, beads and hard sculpts that illustrate the environment of a forest into the puppet.


In Progress.
This puppet was made for the original pitch idea for my film "Sobre el Mar". I was interested in exploring material textures and their interactions with each other; therefore, this puppet was constructed with a mixture of soft materials, beads and hard sculpts that illustrate the environment of a forest into the puppet.


Frank (2024).
Aluminum wire, Upholstery foam, Polymer Clay, Wool, 3D printed molds, 3D printed face, Silicone and Chalk pastels .
This puppet was part of my introduction to Digital Fabrication class final project. My goal was to fabricate a stop-motion puppet using digital fabrication techniques like 3D scanning, modeling and printing to create a PLA mold and face for the puppet.
My process consisted in sculpting the body with clay and scanning the sculpt using a 3D scanner with the purpose of digitalizing it and, by using Blender, creating a two-part mold for silicone casting.
Then, for the silicone casting, I experimented with layering different shades of hues and opacities as well as brushing the figure with chalk pastels to create depth and color variation.
The head of this puppet was sculpted using polymer clay and then 3D scanned. After this, I transferred to blender where I added rigging points. The original intention was to have the face as a replacement animation, but my prototypes were unsuccessful.
Molds design.

1.3D Scan of Sculpt

2.3D Mold of Sculpt

3.3D Print of Mold and Silicone cast


2023
"Day of the Dead"

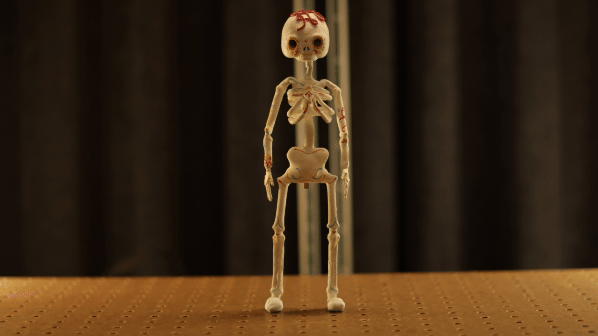
Lu.
Aluminum wire, Upholstery foam, Polymer Clay, Epoxy clay, Latex, and Acrylic Paint.
This puppet was my part of my Introduction to Stop-Motion class final film and where I started my puppet fabrication journey for this puppet is the first I have ever fabricated.
My process consisted in creating an aluminum wire armature and bulking it with closed cell upholstery foam and wrapping it with Pre-wrap and painting it with acrylic paints.
The ribcage was sculpted using the aluminum wire and epoxy clay and glued to the armatures touch points.

In Progress.


